Google AutoML - Is the Mountain Out?
A coworker of mine recently tried out Google’s AutoML product to train an image classifier with minimal training data. AutoML is one of these “off the shelf” machine learning tools. I thought I’d give it a shot.
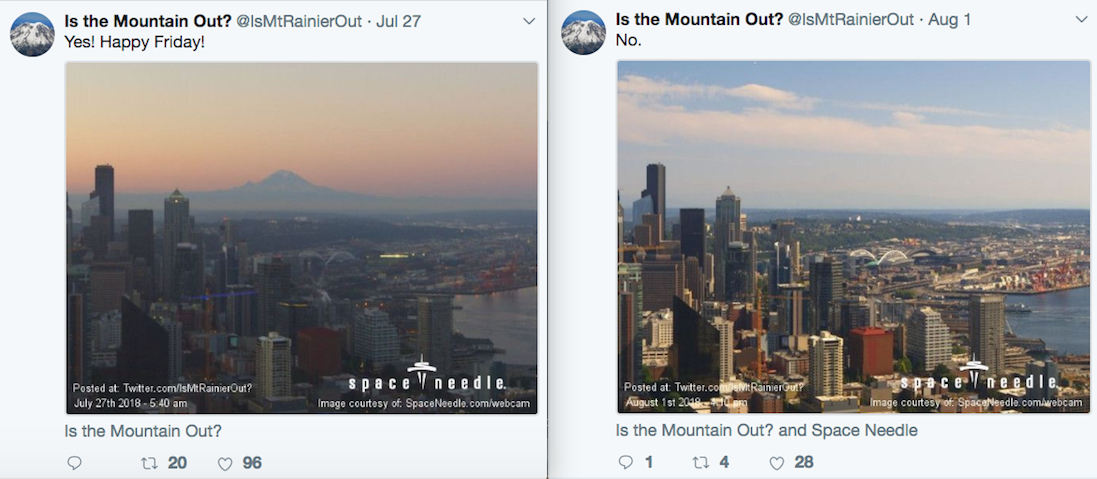
Since moving to Seattle, I’ve become familiar with the question “Is the mountain out?” The question refers to whether or not Mt Rainier is visible from the city. I’ve come across a fun twitter account which automatically takes photos of the city towards the South-East and declares whether or not the mountain is out.
I decided to build an image classifier to automatically determine whether the mountain was out in an image.
Gathering
I used Python with selenium to pull tweet text and image urls from @IsMtRainierOut’s account. The scraper outputs a CSV with rows per tweet, eg:
'Yes!', 'https://pbs.twimg.com/media/Bnd9Re_IIAEK5X3.jpg'
'No.', 'https://pbs.twimg.com/media/BpTwDvuIEAADJCT.jpg'
...
See my script if you’re really interested.
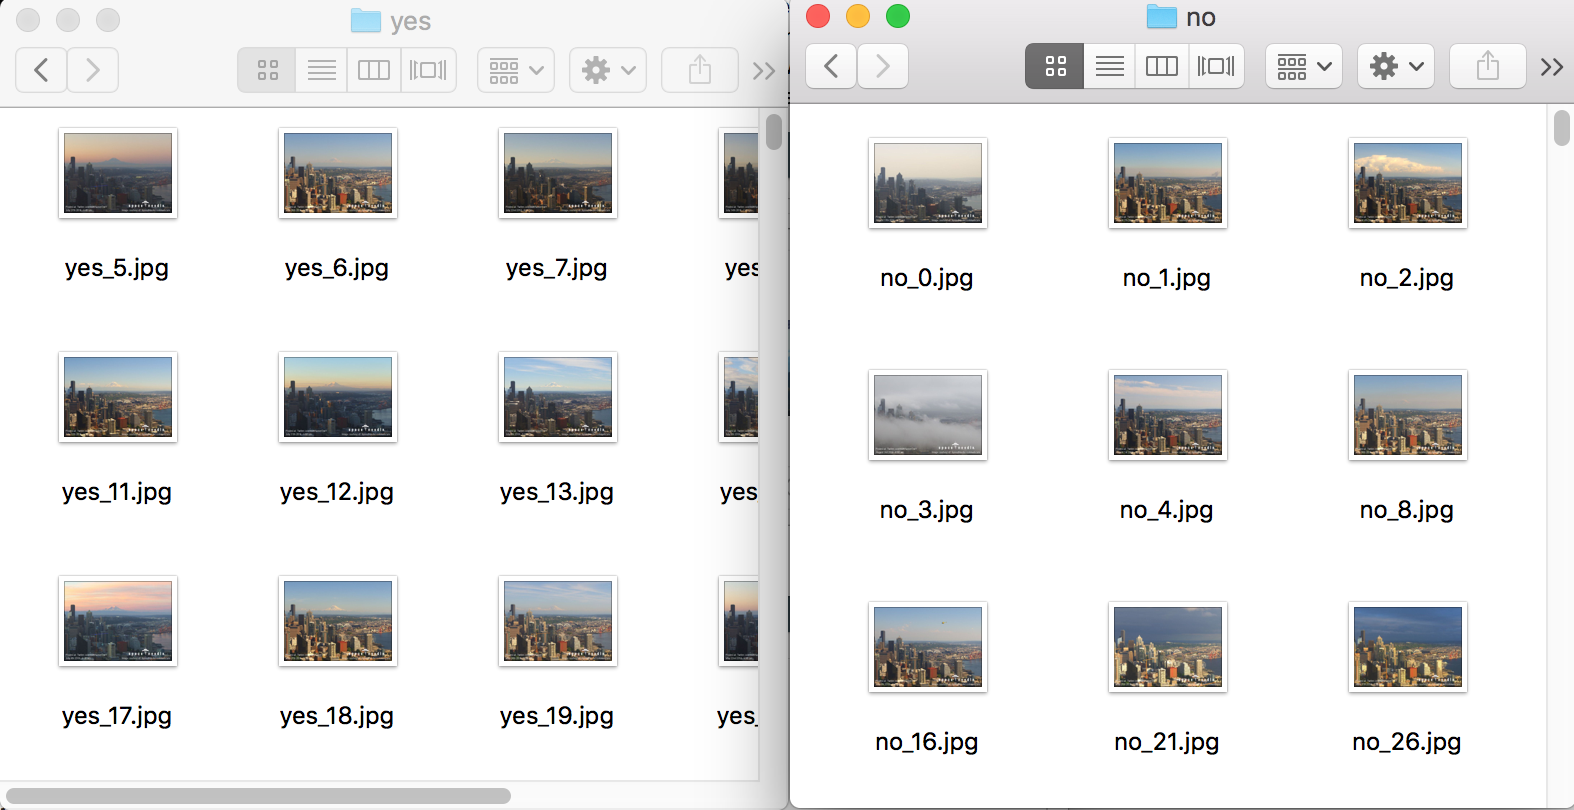
Then I wrote a second script to read the CSV, determine the image class from the text, and download the image.
I used complex NLP to transform the unstructured tweet text into a label.
If the lowercased text contained the word “yes”, it was a yes.
Otherwise, it was a no.
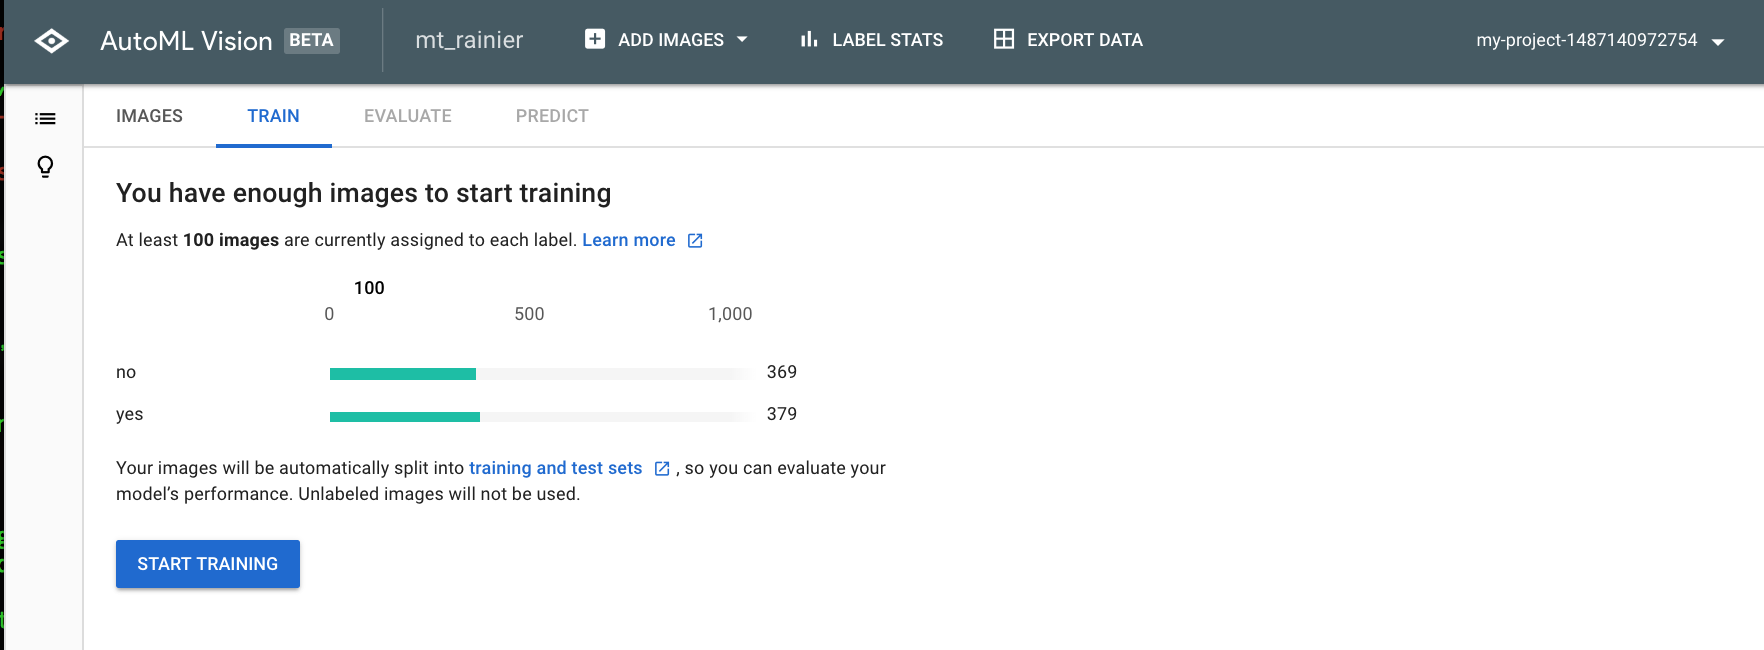
My dataset was 369 no images and 379 yes images.
Considering the bad rap Seattle gets for being overcast, I was surprised the training set was so naturally balanced.
Training
The Google AutoML platform is pretty straightforward and nicely documented. After setting up an account with Google Cloud Platform ($300 credit!), setting up an AutoML takes just a few clicks.
Once the project is set up, the first step is importing data. Importing is easy enough, AutoML accepts a zip file containing directories of images for each label. It’s worth mentioning that AutoML also allows the user to specify a test/train/validation split themselves. By default however, the splitting will happen automatically.
Now it is time to train! When training, you can specify how many node-hours you would like to train or if you’d like to train for and edge device. I used one node-hour for non-edge devices.
Evaluation
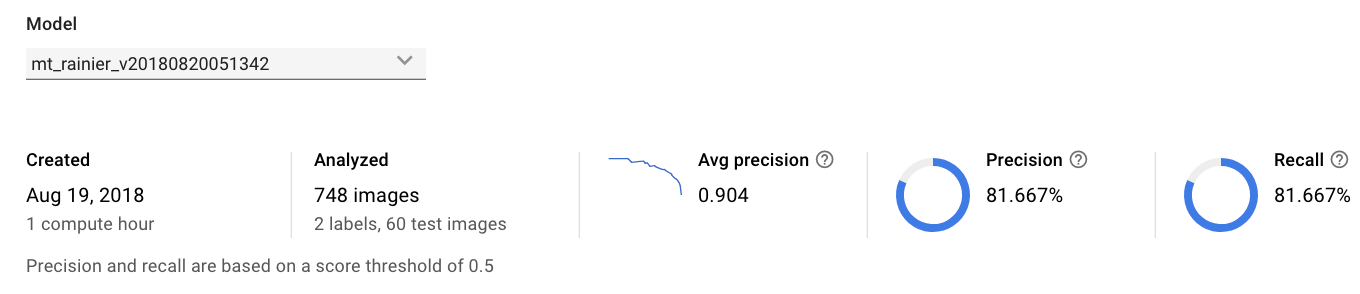
After less than an hour of training, my model acheived just over 80% precision and recall. Hurray! AutoML provides some basic info about the training and outcomes. I thought the confusion matrix was the most interesting, showing the model had the most trouble correctly identifying the mountain was out when it really was.
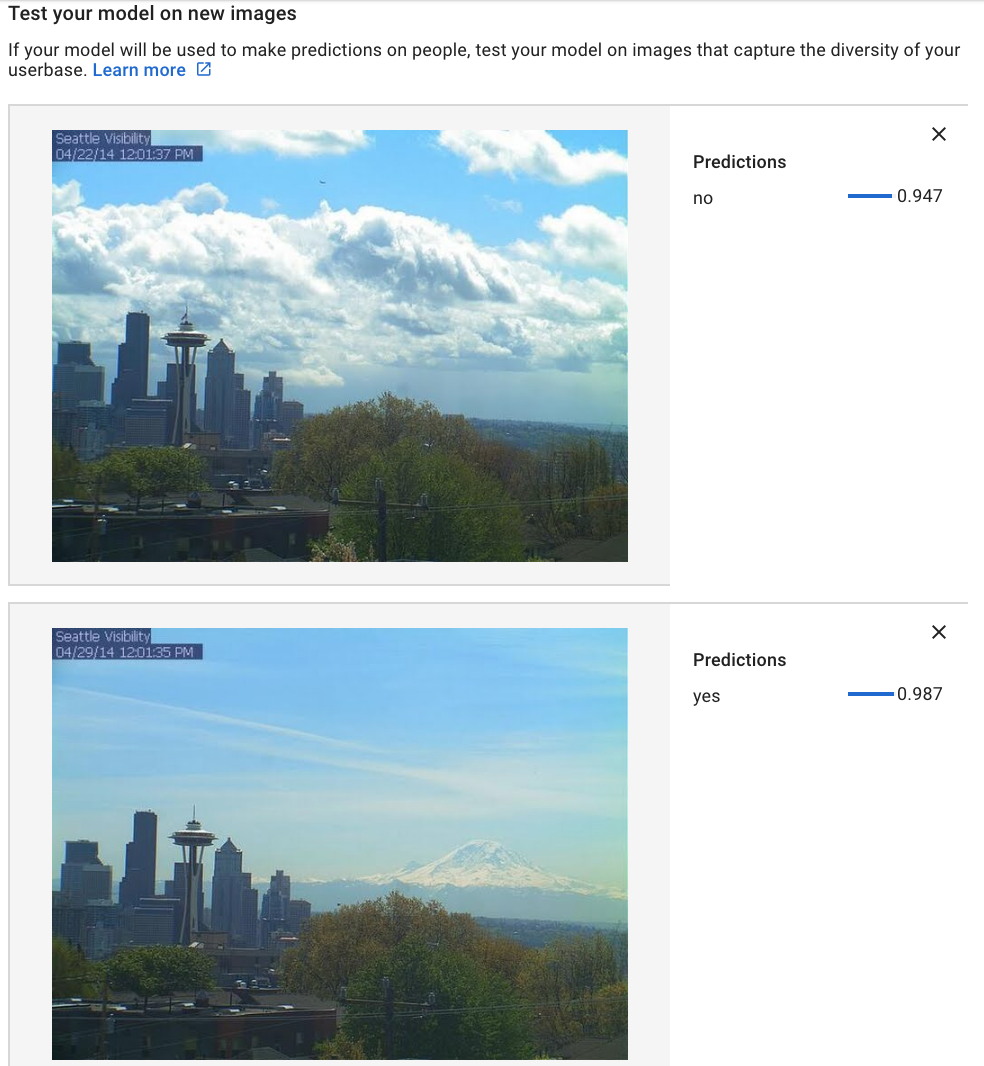
Once you’ve got the model trained, you can upload new images to try it out. My two final test images scored beautifully on the model! Google AutoML also offers an API you can hit your model through.
Thoughts
The biggest plus of Google AutoML was how off the shelf it was. No hyperparameters to tune, no resizing images, no splitting into test/training, just drop images into two buckets and go.
That being said, I didn’t learn much about Deep Learning doing this exercise. Stepping through a similar project with AWS SageMaker inspired me to learn about the different hyperparameters and steps in training a CNN. Further, having to wrestle with .rec files for SageMaker instead of uploading images so easily forced me to learn about a whole new image file type.
In any case, my whining about too much abstraction aside, this tool is great for demonstrating what ML can do these days. A big company like Facebook or LinkedIn would certainly have their own in-house ML experts to build an internal system. However, for an individual developer or small company wanting to classify images, this seems like a great solution. In contrast to AWS Sagemaker, there doesn’t seem to be any cost to keeping an endpoint up for classifying images once the model is trained. The cost is a $3 per 1000 images which seems totally reasonable for a small scale use-case.
There are several off the shelf tools like this, it’ll be exciting to see what is offered over the next few years.